CreatingPersonalPages
Note: You are viewing an old version of this page. View the current version.
Creating Your KCPR Alumni Personal Page
(I'm writing this page now -- 9:20 AM Pacific time on 11/7/07. Coming soon!)
The alumni personal pages on this wiki let you write about yourself and your time at KCPR. (You can also make a short summary listing for yourself in the  alumni by year pages. That listing will help people find your personal page.)
Here's how to make a personal page. (Hint: to see this page as you go, print it. Or open it in another browser window: right-click or control-click on the page name CreatingPersonalPages, then choose "Open in new window" from the pop-up menu that appears.)
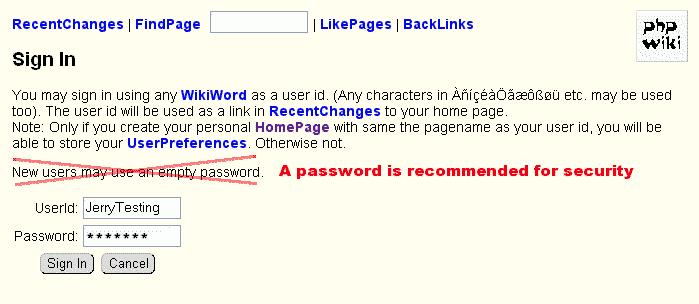
Step 1: If you haven't set up an account on this alumni wiki and logged in, do that. (Hint: You can use the same user ID and password for the  alumni photo gallery, which is separate from this wiki.) To make an account, simply click on the "Sign in as" button at the lower-right corner of any page, then fill in the following page (see notes below):

It's a (very!) good idea to choose a user ID that's your first and last name, with the first letter of each capitalized, with no space between -- like JerryPeek. A password is also recommended. Click "Sign In".
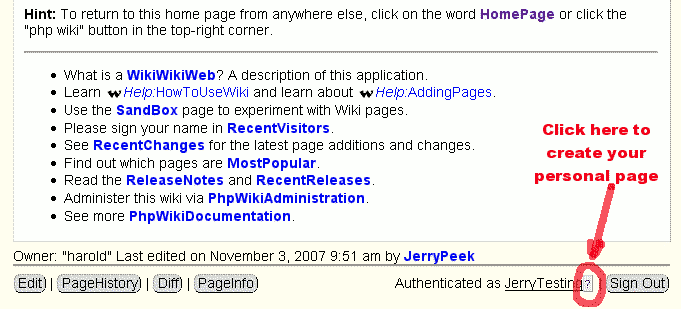
Step 2: After you create your user ID, you'll be taken back to the home page. Go to the bottom right corner of the page and look for "Authenticated as:", followed by your user ID. This shows that you're logged in.
After your user ID, there should be a question mark (?). Click on the question mark:

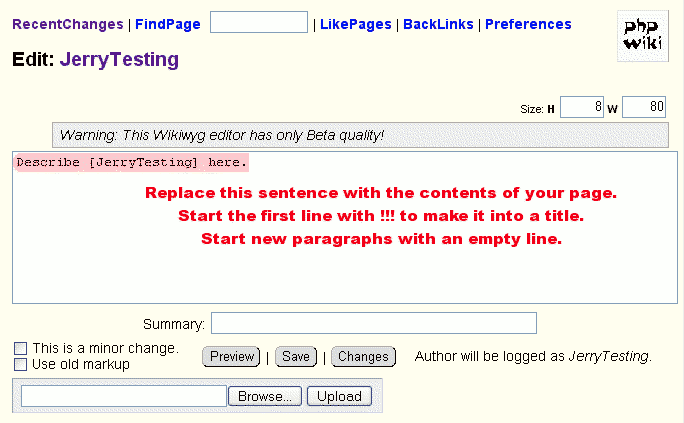
Step 3: You'll get an editing window with a single line of text, highlighted in red here:

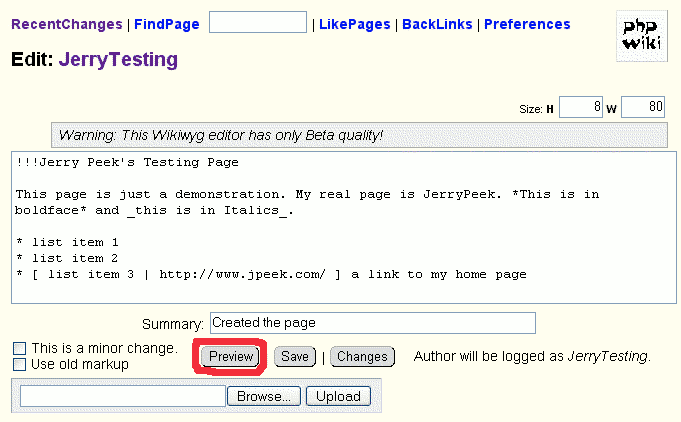
Replace that text with the contents of your personal page. To format your text, you won't be using editing commands like, say, Microsoft Word. Instead, you'll use special punctuation characters. (Don't worry about being fancy at first. You can come back later, after you've put the words in, to do more!) There's a slightly-fancy example below:

Any time before you finish, you can click the "Preview" button to view the formatted page that others will see when you finish.
Step 4: yadda yadda
